 |
| Credit: Hakeem Rafai |
It has been a little while since the last game of Infinity and I was keen on testing out the USAriadna miniatures that I have been painting.
My gaming group was also interested to see how they played as a faction and in my desperate rush to get 300 points onto the table I had do deploy some of my half finished models. Boo! The dice gods will punish me I'm sure!
We decided on playing Supplies as it is a reasonably straight forward mission and it proved to be a bloody match!
ARMIES
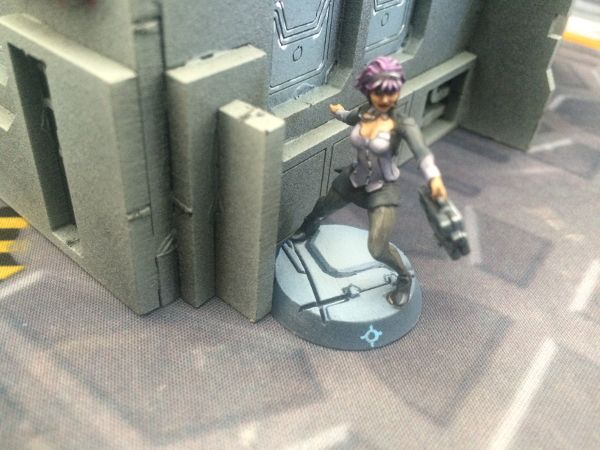
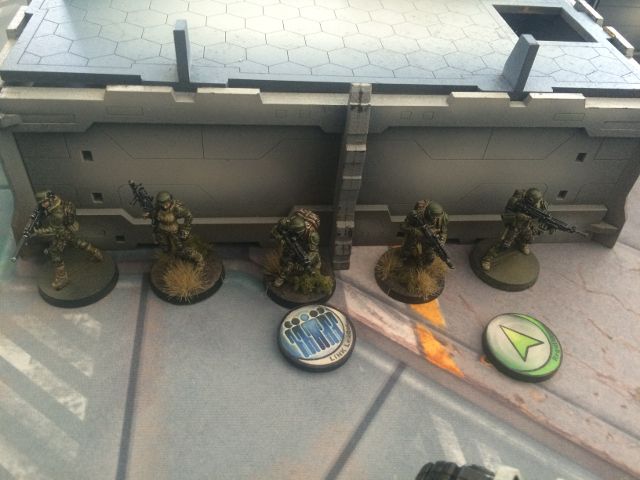
USAriadna
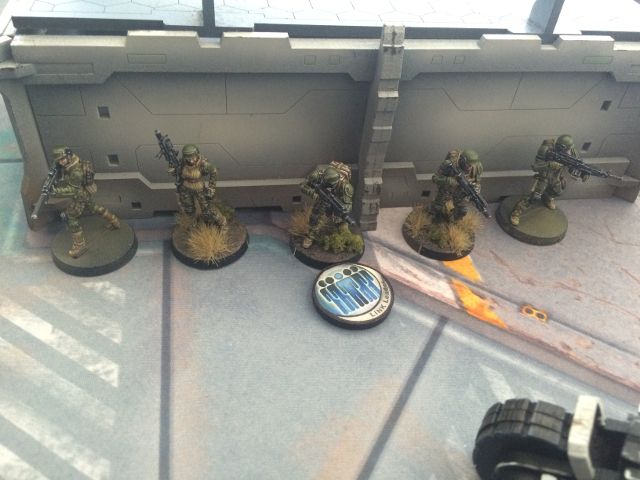
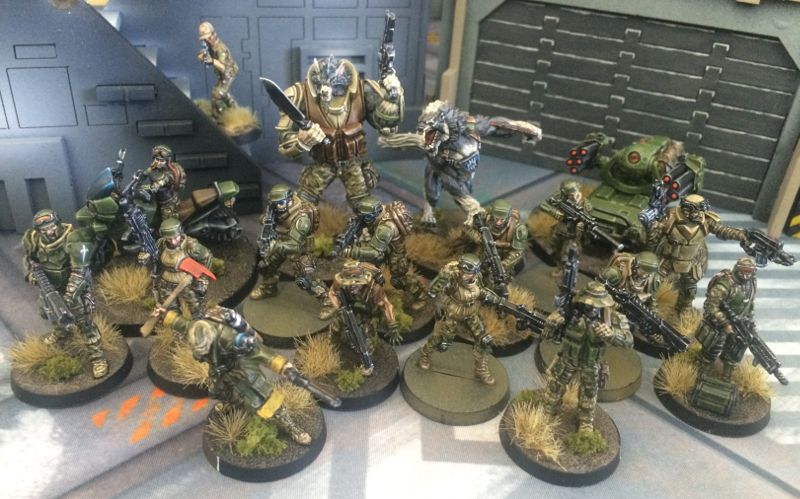 |
| Dishing out servings of Freedom. |
Group 1
 GRUNT Lieutenant Rifle, Light Grenade Launcher / Pistol, Knife. (1 | 14)
GRUNT (Forward Observer) Rifle / Pistol, Knife. (11)
GRUNT (Forward Observer) Rifle / Pistol, Knife. (11)
GRUNT (Forward Observer) Rifle / Pistol, Knife. (11)
GRUNT (Marksmanship LX) Sniper Rifle / Pistol, Knife. (0.5 | 18)
GRUNT HMG / Pistol, Knife. (1 | 21)
GRUNT (Inferior Infiltration) Heavy Flamethrower, Light Shotgun / Pistol, Knife. (0.5 | 11)
GRUNT Lieutenant Rifle, Light Grenade Launcher / Pistol, Knife. (1 | 14)
GRUNT (Forward Observer) Rifle / Pistol, Knife. (11)
GRUNT (Forward Observer) Rifle / Pistol, Knife. (11)
GRUNT (Forward Observer) Rifle / Pistol, Knife. (11)
GRUNT (Marksmanship LX) Sniper Rifle / Pistol, Knife. (0.5 | 18)
GRUNT HMG / Pistol, Knife. (1 | 21)
GRUNT (Inferior Infiltration) Heavy Flamethrower, Light Shotgun / Pistol, Knife. (0.5 | 11)
 MARAUDER Paramedic (MediKit) Rifle, Heavy Flamethrower / Heavy Pistol, Knife. (23)
 MINUTEMAN (Marksmanship L1, X-Visor) AP Rifle, 2 Light Flamethrowers / Pistol, CCW. (29)
 MAVERICK (Forward Observer) Rifle / Pistol, Knife. (0.5 | 19)
Group 2
MAVERICK (Forward Observer) Rifle / Pistol, Knife. (0.5 | 19)
Group 2
 TRAKTOR MUL (Total Reaction) Uragan MRL / Electric Pulse. (1 | 18)
 DOZER (Traktor Mul Control Device) Rifle, D-Charges / Pistol, Knife. (14)
 112 Light Shotgun / Pistol, CCW. (12)
 FOXTROT (Forward Observer) Rifle, Antipersonnel Mines / Pistol, Knife. (18)
FOXTROT (Forward Observer) Rifle, Antipersonnel Mines / Pistol, Knife. (18)
FOXTROT (Forward Observer) Rifle, Antipersonnel Mines / Pistol, Knife. (18)
 HARDCASE FRONTIERSMAN Tactical Bow, Light Shotgun / Pistol, Knife. (12)
 DEVIL DOG Heavy Shotgun, Smoke Grenades + 1 K-9 Antipode / AP CCW. (39)

 K-9 ANTIPODE AP CCW. (7)
4.5 SWC | 299 Points
K-9 ANTIPODE AP CCW. (7)
4.5 SWC | 299 Points
I'll be the first to say that this wasn't my 300 point list of choice. However, it was the only list with a link team of 5 that I could put together so I ran with it.
The strengths of the list are pretty obvious- infiltrating/ advance deployed specialists for button pushing and the Grunt link team for firepower. The Maverick and Devil Dog I'm a bit unsure about how to use properly but I guess playing these games will help me figure it out.
PanOceania
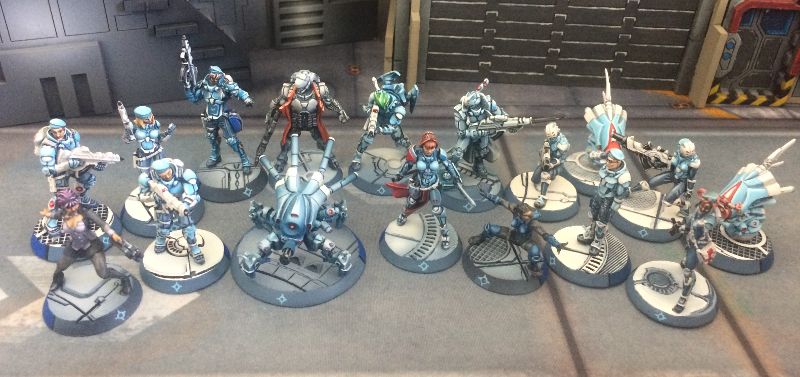 |
| God Wills It! |
Group 1
 AUXILIA (Forward Observer) Combi Rifle + AUXBOT_1 / Pistol, Knife. (15)
 AUXBOT_1 Heavy Flamethrower / Electric Pulse. (4)
AUXILIA (Forward Observer) Combi Rifle + AUXBOT_1 / Pistol, Knife. (15)
AUXBOT_1 Heavy Flamethrower / Electric Pulse. (4)
AUXBOT_1 Heavy Flamethrower / Electric Pulse. (4)
AUXILIA (Forward Observer) Combi Rifle + AUXBOT_1 / Pistol, Knife. (15)
AUXBOT_1 Heavy Flamethrower / Electric Pulse. (4)
 BOUNTY HUNTER Spitfire / Pistol, Knife. (1 | 20)
 FUSILIER Hacker (Hacking Device) Combi Rifle / Pistol, Knife. (0.5 | 18)
FUSILIER (Forward Observer, Deployable Repeater) Combi Rifle / Pistol, Knife. (12)
FUSILIER Paramedic (MediKit) Combi Rifle / Pistol, Knife. (12)
FUSILIER Hacker (Hacking Device) Combi Rifle / Pistol, Knife. (0.5 | 18)
FUSILIER (Forward Observer, Deployable Repeater) Combi Rifle / Pistol, Knife. (12)
FUSILIER Paramedic (MediKit) Combi Rifle / Pistol, Knife. (12)
 MACHINIST Combi Rifle, D-Charges / Pistol, Knife. (15)
 PALBOT Electric Pulse. (3)
 TRAUMA-DOC Combi Rifle / Pistol, Knife. (14)
 AKAL COMMANDO Combi Rifle + E/Mitter / Pistol, E/M CCW. (24)
 NISSE MULTI Sniper Rifle / Pistol, Knife. (1.5 | 34)
 JOAN OF ARC Lieutenant MULTI Rifle, Nanopulser / Pistol, DA CCW. (+1 | 50)
Group 2
 SIERRA DRONBOT HMG / Electric Pulse. (1 | 25)
FUSILIER Combi Rifle / Pistol, Knife. (10)
SIERRA DRONBOT HMG / Electric Pulse. (1 | 25)
FUSILIER Combi Rifle / Pistol, Knife. (10)
 CROC MAN (Forward Observer, Deployable Repeater) Combi Rifle, Antipersonnel Mines / Pistol, Knife. (32)
4 SWC (+1) | 299 Points
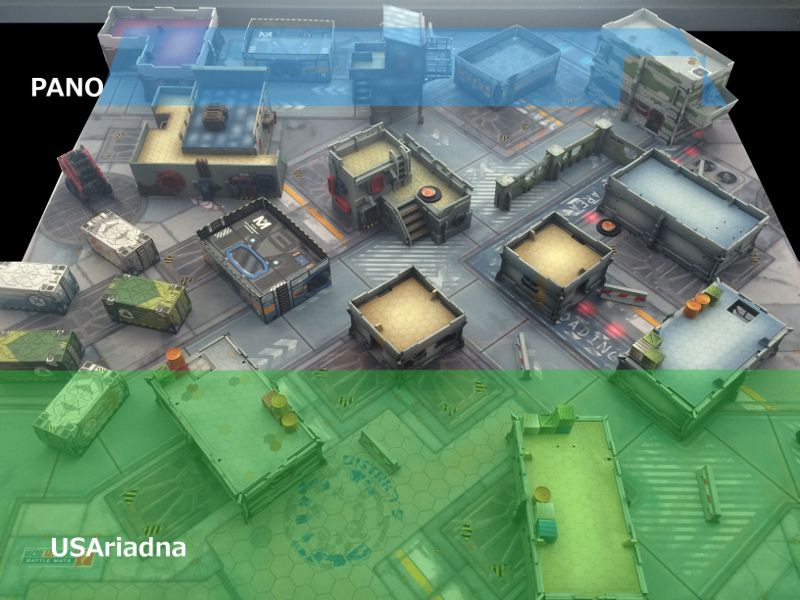
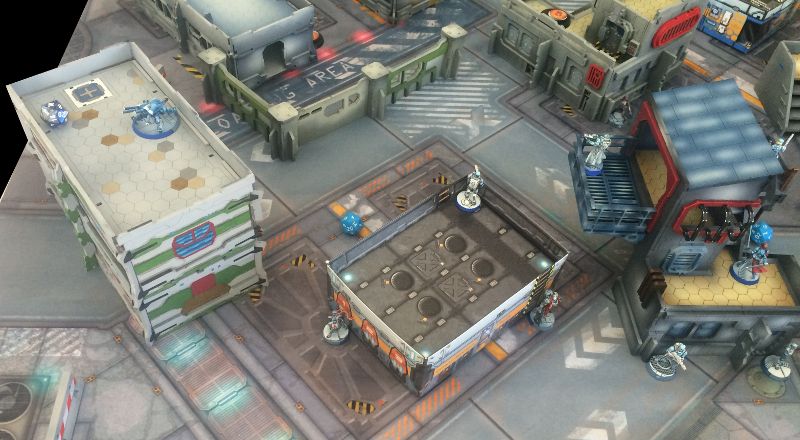
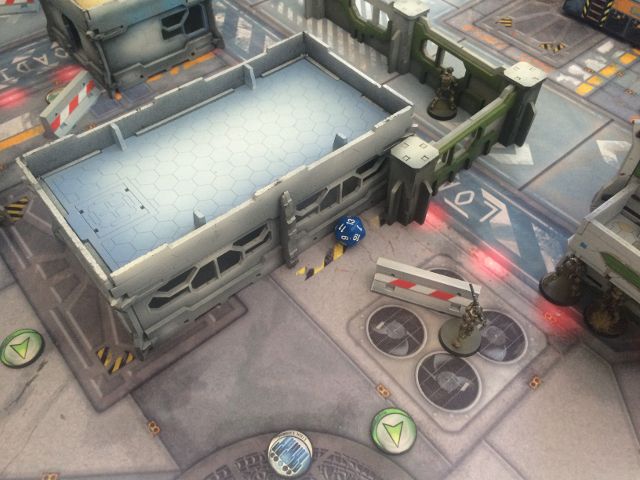
TERRAIN
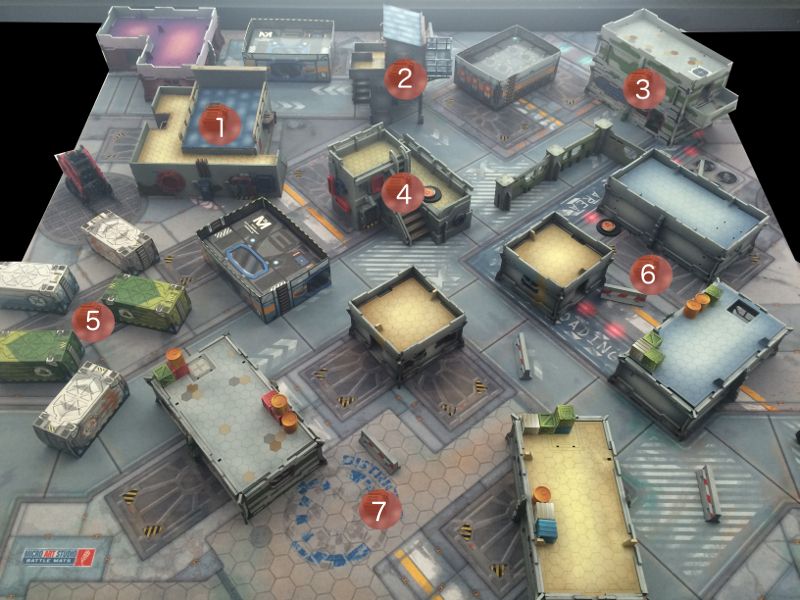 |
| Dawn rises over the battlefield. |
I set up the t
errain, skewing the high terrain on one side and the low terrain on the other.
The key terrain features are:
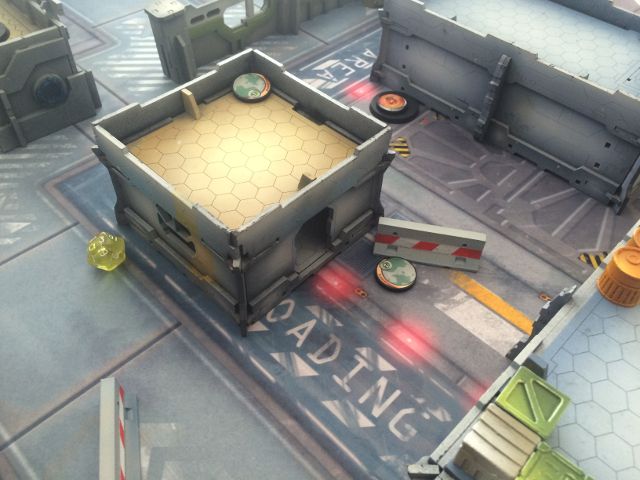
1. The Garage.
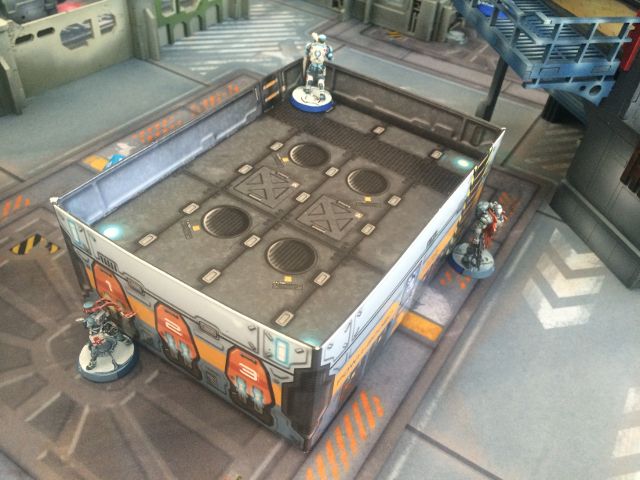
2. The Loading Dock.
3. The Apartment.
4. Central Processing.
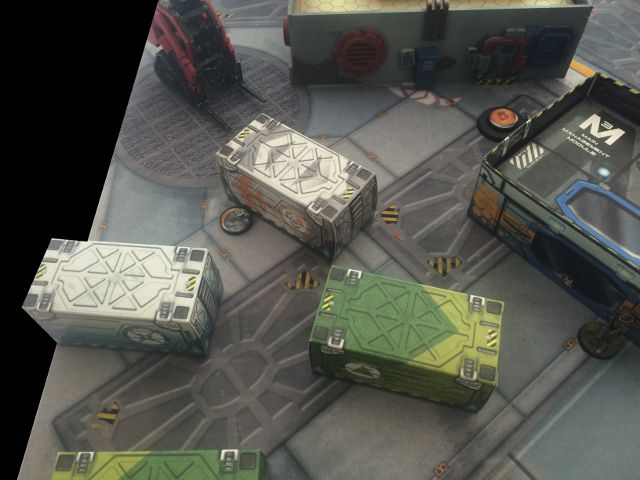
5. The Container Yard.
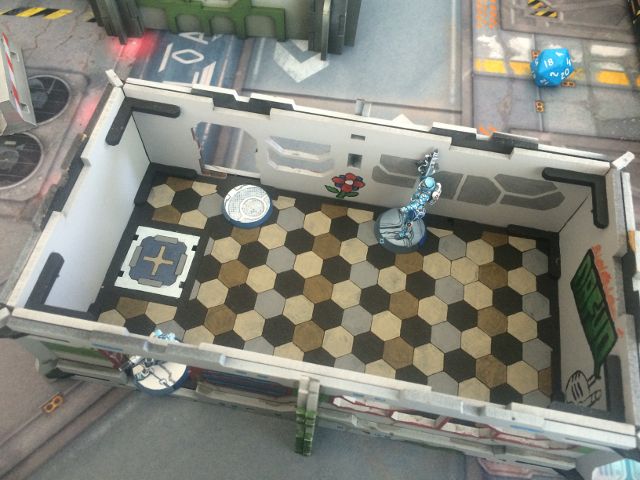
6. The Mall. A collection of three single storey structures with an incomplete wall protecting one side.
7. The Plaza. An open area.
MISSION
 |
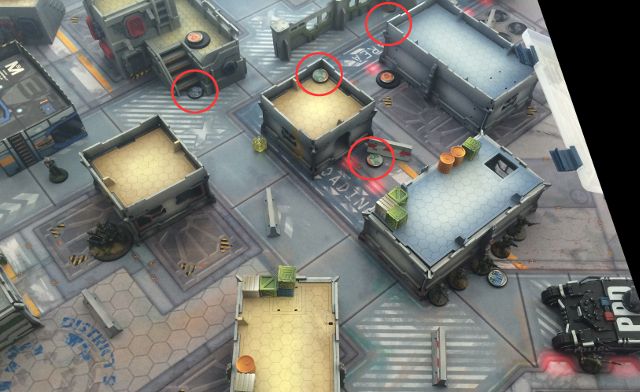
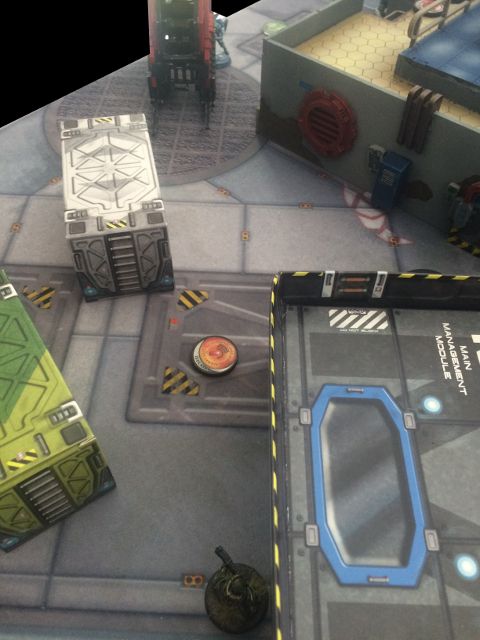
| Supplies in Tech Coffins. |
The mission was "Supplies" from the ITS2015 scenario pack.
The premise is that there are 3 tech coffins placed along the centre line of the map and inside each coffin is a supply crate. It takes a specialist one successful WIP roll to extract the crate (+3 WIP if you are a doctor).
The points are then scored for how many crates you have in your possession at the end of the game.
In addition to this each player receives two classified objectives.
Classified Secondary Objectives
USAriadna: Telemetry and HVT Designation. (Hopefully achievable with all the FOs I have).
PanO: Extreme Prejudice and Telemetry.
Lieutenant Roll Off
With all that sorted out we had the Lieutenant roll and I critted on a '12'. Hurrah! Time for me to go first.
PanO elected to choose the board edge (selecting the higher ground) and opting for me to deploy first.
DEPLOYMENT
 |
| Deployment zones. |
USAriadna Deployment
 |
| Low ground and facing into the sun (literally). |
I had two main thoughts when deploying my figures. The Grunt link team had to be in a good position to start hammering away at the enemy and that my specialists were close to the objectives. Luckily- with infiltrating Foxtrots- it was something I could easily do!
 |
| Hiding everything... |
On my left I hid my Grunt LGL Lt. and the Devil Dog team around the container yard.
 |
| Left flank. |
 |
| Out of sight. Out of fire. |
 |
| Lt. finds a shady spot. |
Then tucked behind the buildings framing the Plaza, I positioned the Minuteman, the Dozer and his Traktor and also the Maverick.
 |
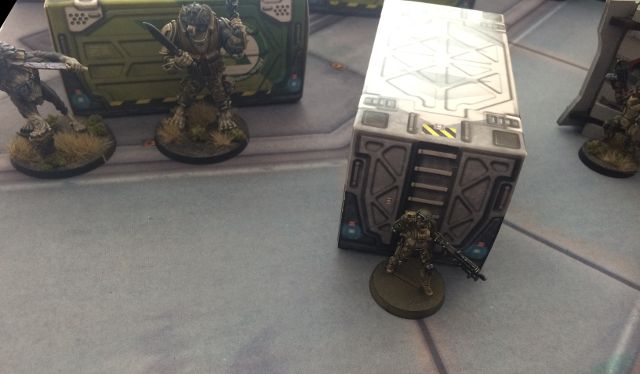
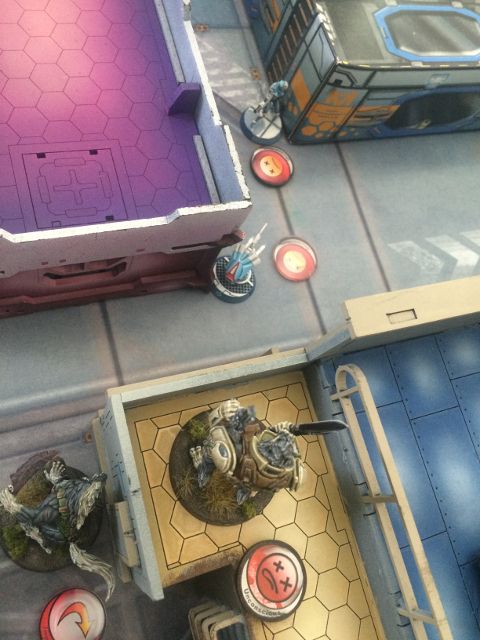
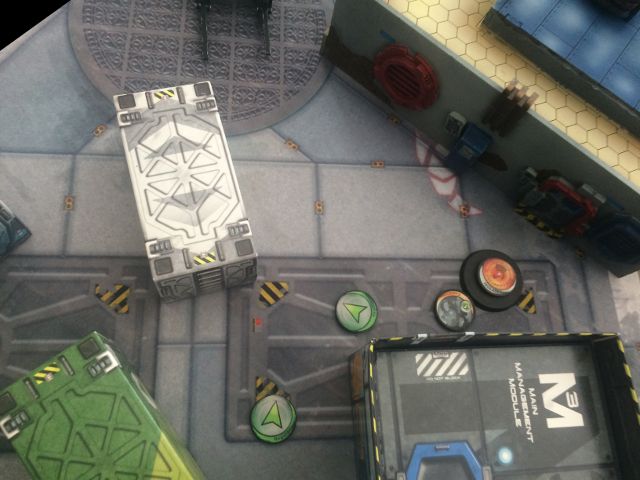
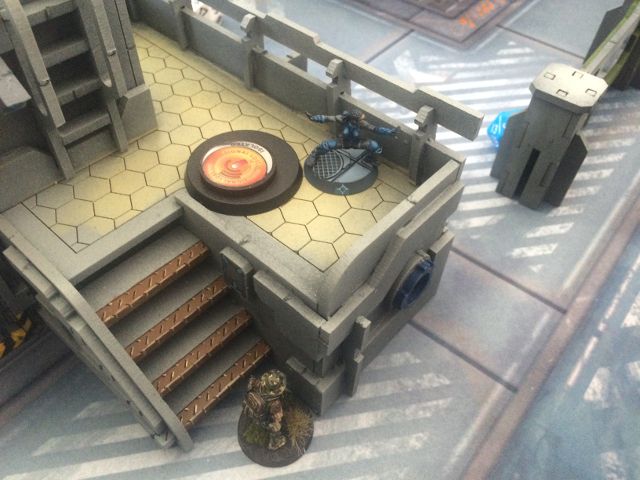
| Advanced Deployment Marauder. |
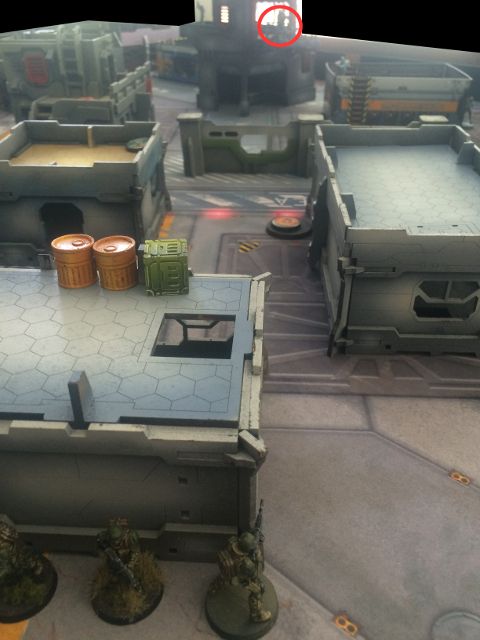
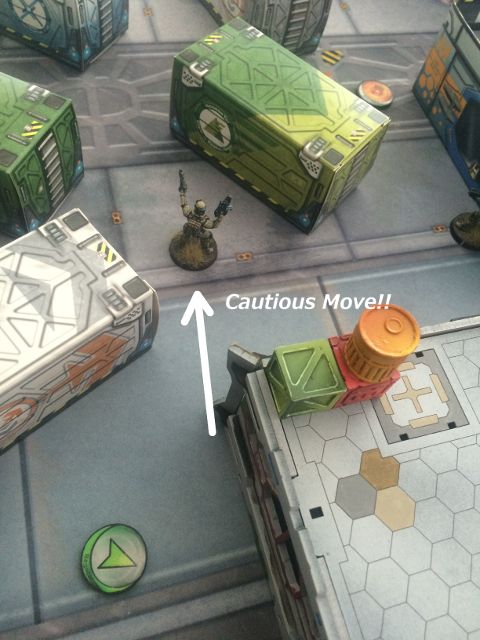
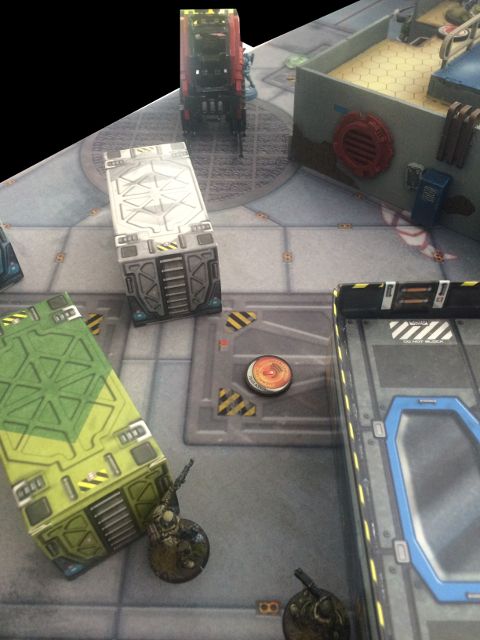
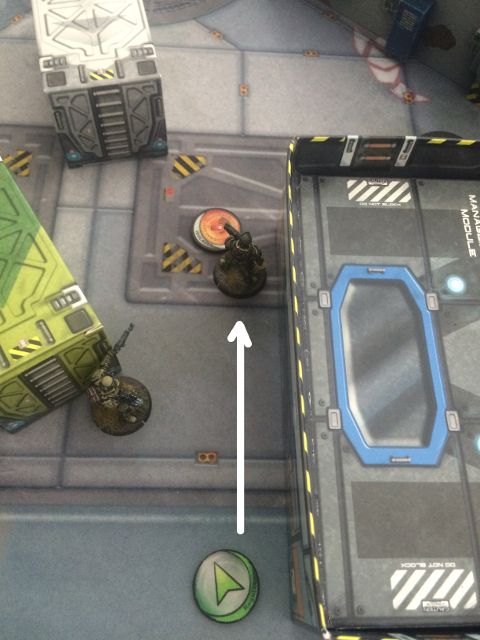
My Marauder, I advance deployed in the direction of the Tech Coffin closest to the garage.
I also left my HVT out in the open close by. Hopefully well protected by the nearby USAriadna troops.
 |
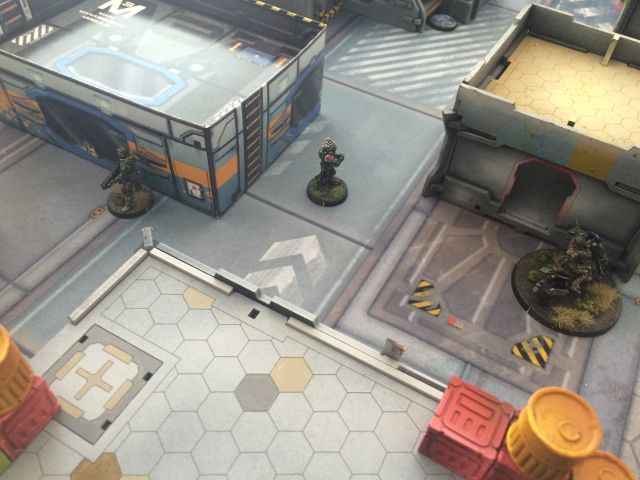
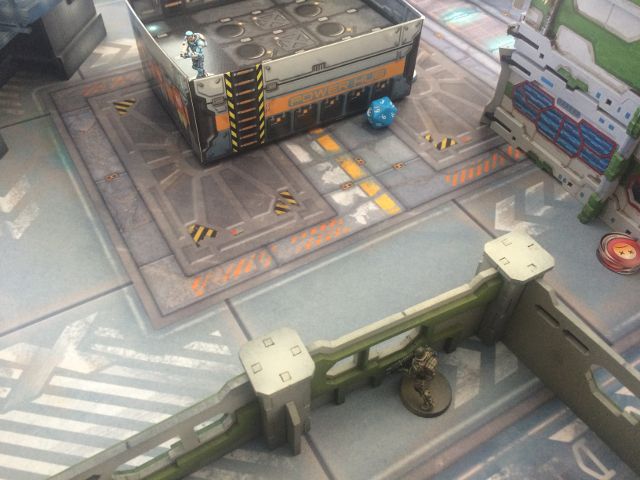
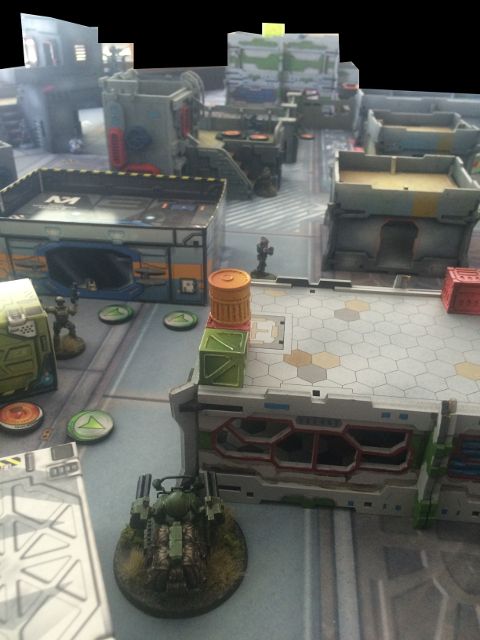
| USARF right flank. |
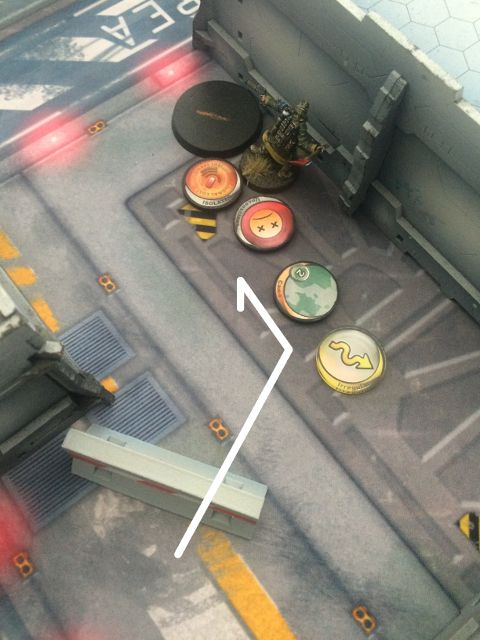
I infiltrated one of my Foxtrots close to the centre objective and set up my Hardcase and his Ambush Camouflage token close to the right most objective.
My 112 Doctor I hid behind the police car- supporting the Grunt link team.
 |
| Ready for action. |
 |
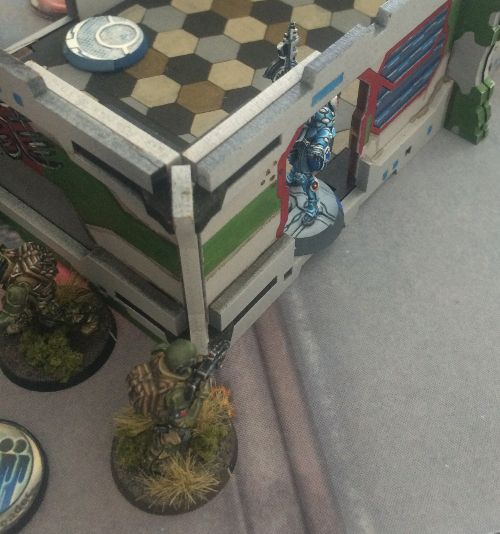
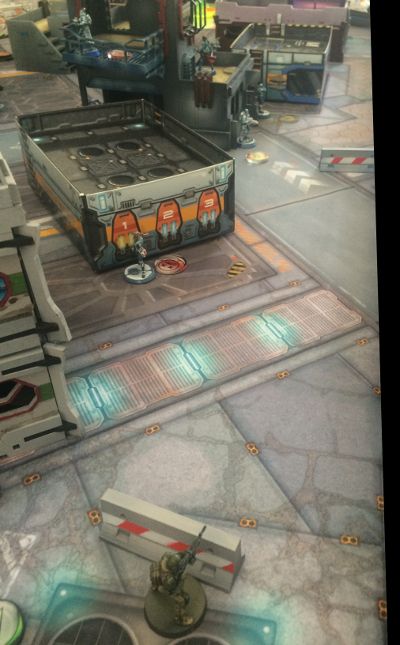
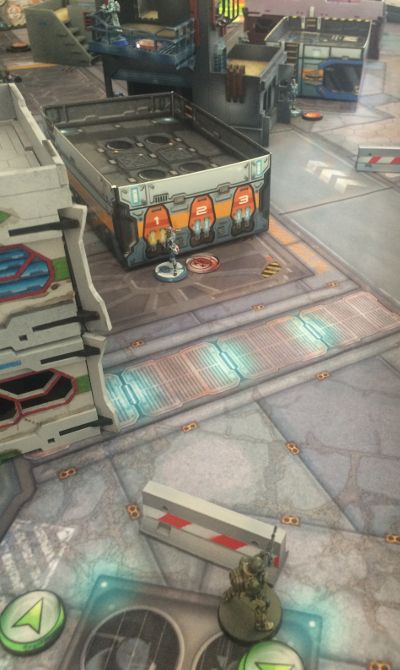
| Inferior infiltration success! |
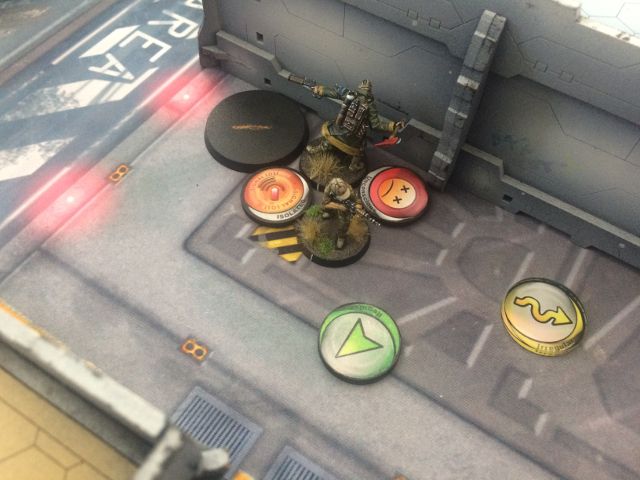
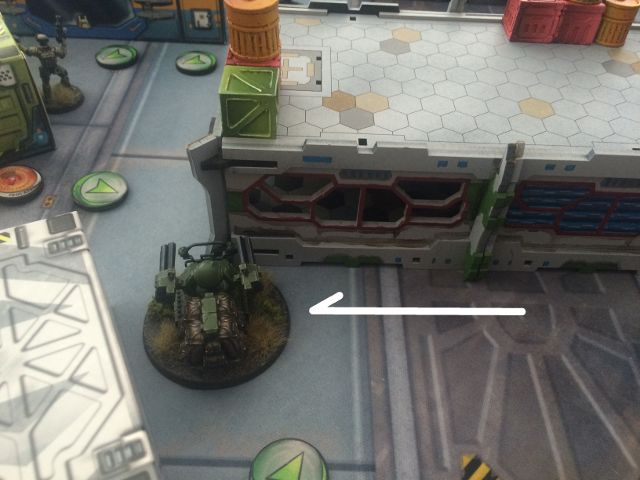
My inferior infiltrating Grunt with his ever trusty flame thrower made it across the board and took up position behind the wall close to the PanO deployment zone.
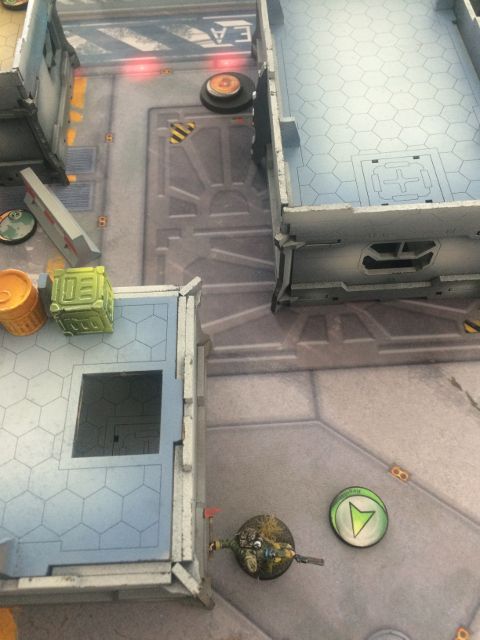
 |
| Guarding the objective. |
 |
| Foxtrot camo marker. |
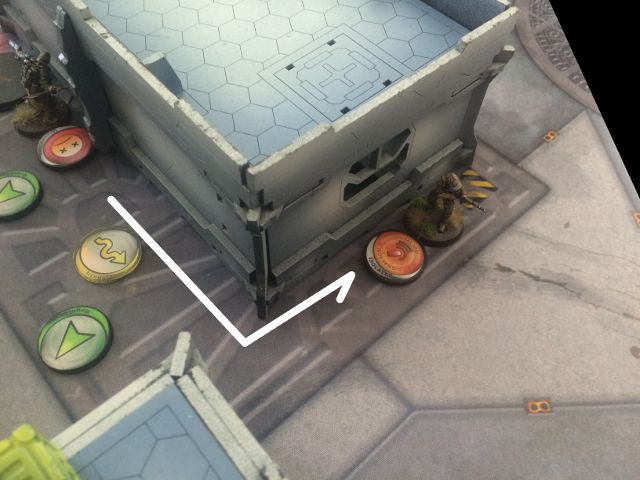
Finally, I kept my last Foxtrot as a reserve- and ended up placing him amongst the containers.
PanO Deployment
 |
| PanO deployment zone. |
 |
| Hard targets. |
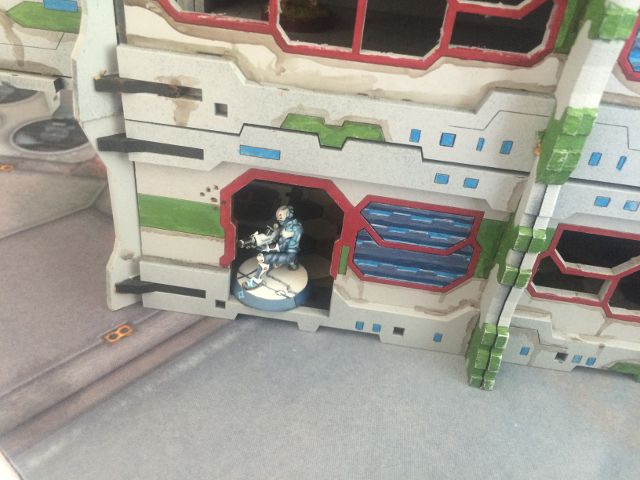
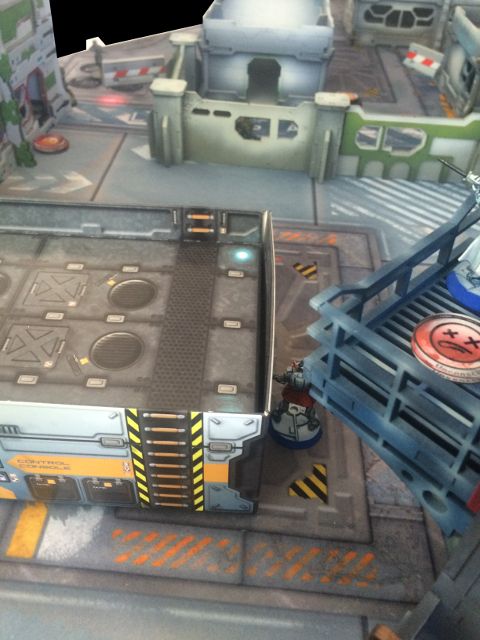
Unsurprisingly, the Apartment and the Loading Dock were focal points for PanO deployment.
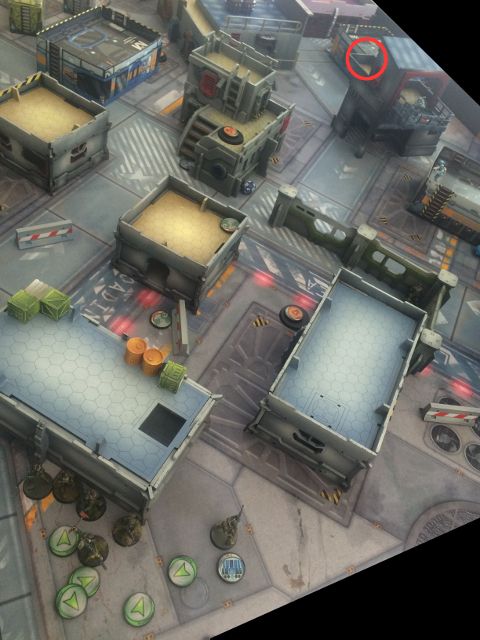
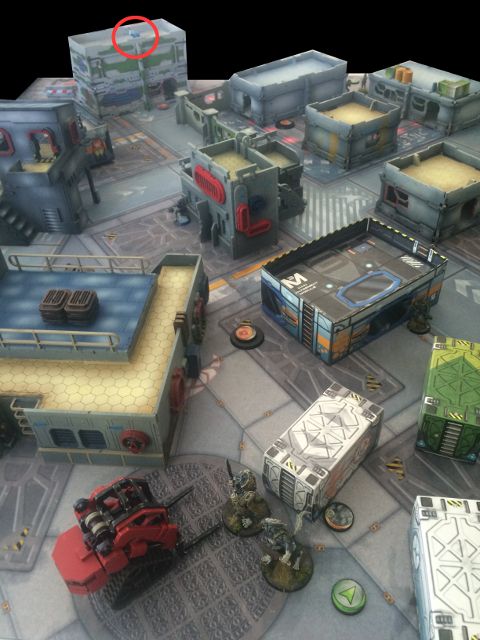
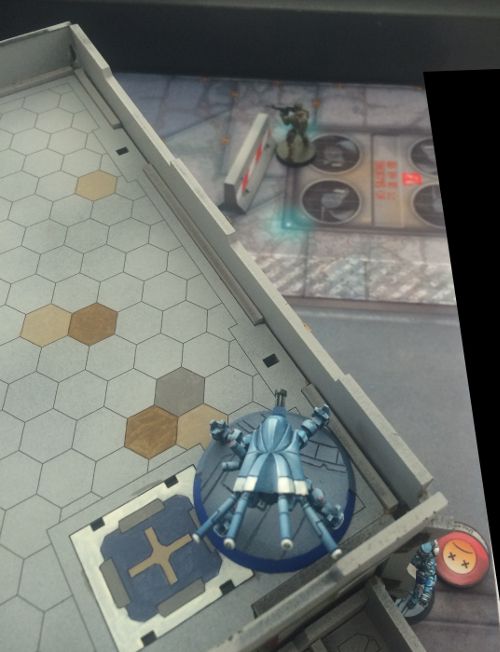
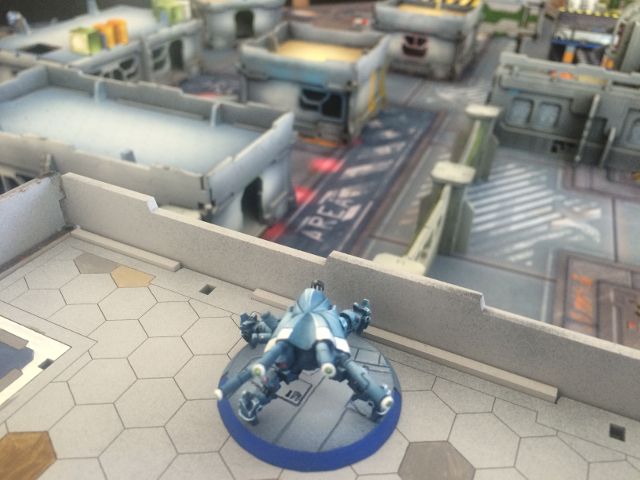 |
| TR Remote on Apartment roof. |
The TR remote had a commanding view over the battlefield and it was supported by more troops on the lower levels.
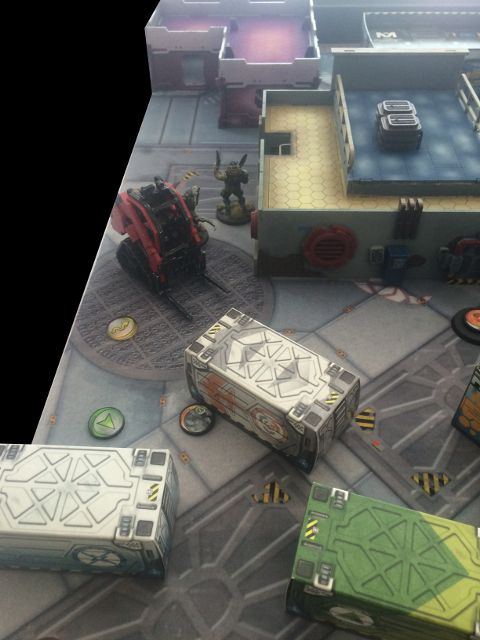
 |
| Hacker and Auxilia+ Auxbot on the ground floor. |
 |
| Soon! |
With the Apartment well defended and supported... the Loading Dock was next.
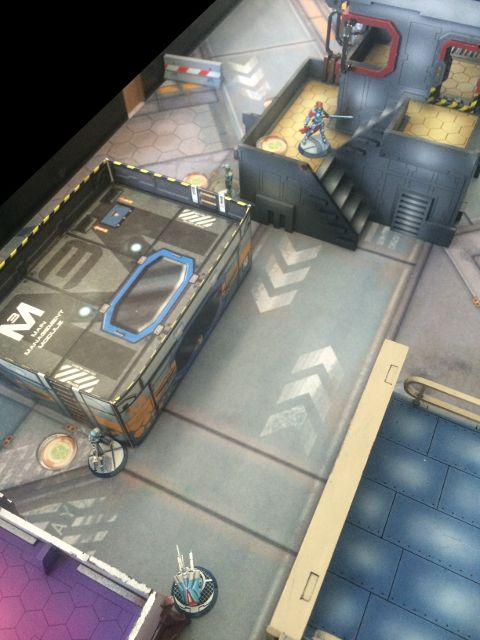
 |
| Guns everywhere. |
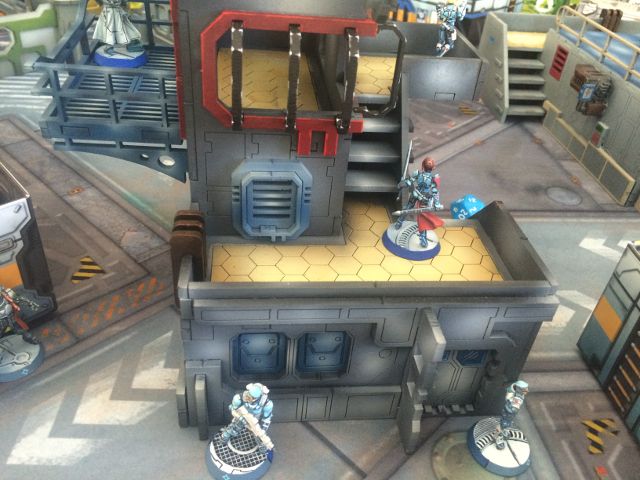
The Nisse took up position on the gantry whilst a Fusilier and Joan looked out to the other flank.
Two Fusiliers watched to the rear and flanks.
 |
| Between the loading dock and the apartment. |
Guarding the gap between the the PanO hard points was another Fusilier looking over the parapet of the power module. A Trauma Doc and the Bounty Hunter looked to the side.
 |
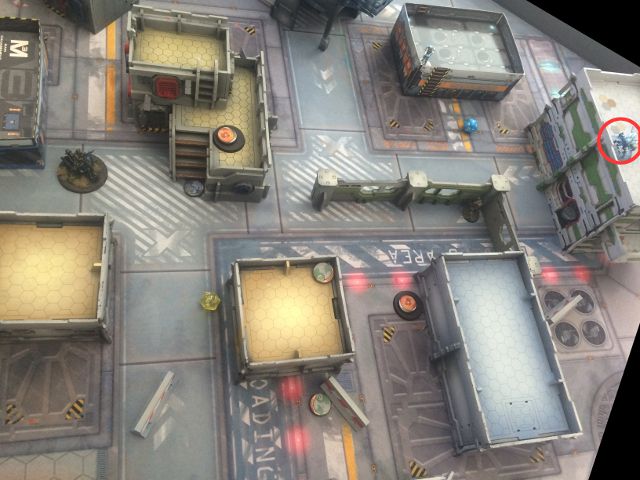
| Auxilia and aux-bot guard the far right PanO flank behind the garage. |
 |
| PanO HVT. |
The PanO HVT (a repurposed CSU) was placed just behind Central Processing- hidden from USARF eyes.
Final reserve placement for PanO was a hidden deployment figure. Hexa? We shall see!
THE BATTLE BEGINS...
USAriadna Turn 1
PanO began hostilities by burning a command token to remove two orders from my smaller combat group. Luckily there were a few impetuous orders to go around....
 |
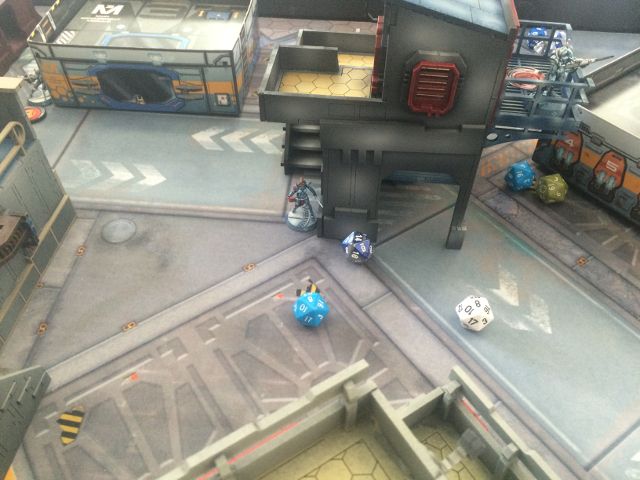
| Impetuous Maverick charges forward, readying the smoke grenade launcher. |
Impetuous orders go first and with that the Maverick rode out to toss out some covering smoke. The PanO TR remote spotted her though and let rip with its HMG.
 |
| TR HMG! |
The remote scored a critical and three other hits- blasting the Maverick into scrap. Booo!
 |
| Such excite! |
With such a poor showing from the Maverick, the Devil Dog grit his teeth and leapt up and over the containers....
 |
| And into the teeth of a the PanO overwatch! |
The TR remote, Joan, the Nisse sniper and two Fusiliers unleashed on the Devil Dog who could only dodge frantically at the hail of lead.
 |
| Wow! Such Dodge! Much Excite! Wow! |
Fortunately the Devil Dog rolled well on his dodge roll and escaped unscathed.
 |
| It's time! |
The Nisse sniper with his MSV2 had to go. It was time for the Grunts to get into the action. Swinging the HMG around the corner, the HMG fired on the Nisse who fired back.
 |
| Burst 5! |
I know it's unlucky to bring unfinished miniatures to play with but surely burst 5 will save the day!
 |
| Bleh! |
The Grunt missed. With Every. Single. Burst.
The Nisse landed a double action round on the Grunt and knocked him unconscious.
That's ok, that's why there's a doctor nearby....
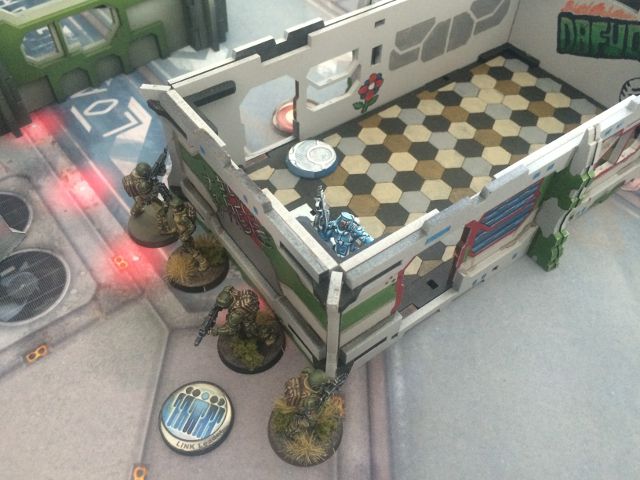
 |
| Someone dial 112??? |
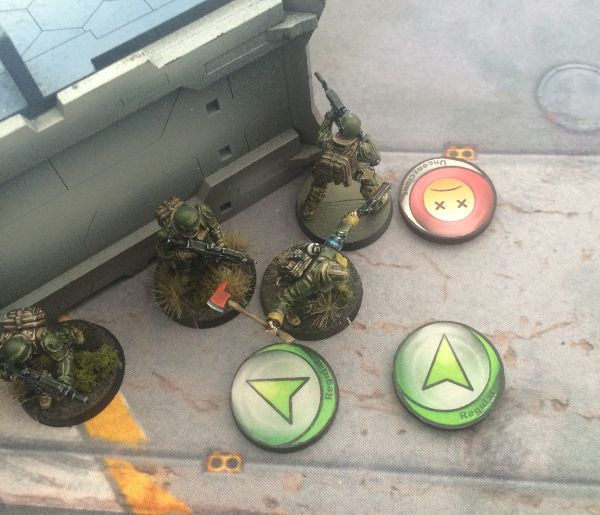 |
| What are going to do with that axe? |
No cube. Low WIP. Oh boy....
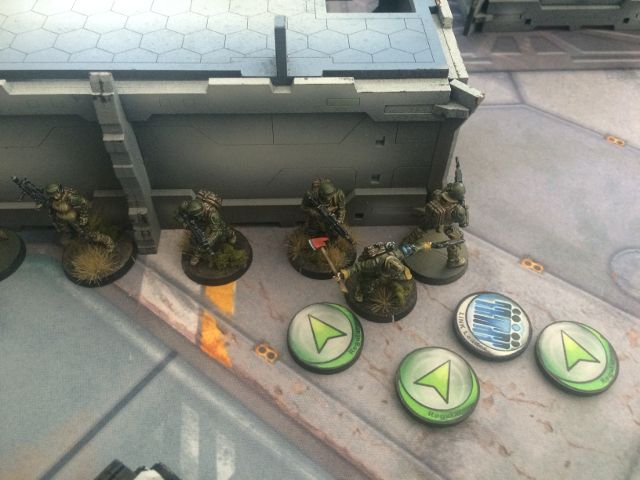 |
| Success! |
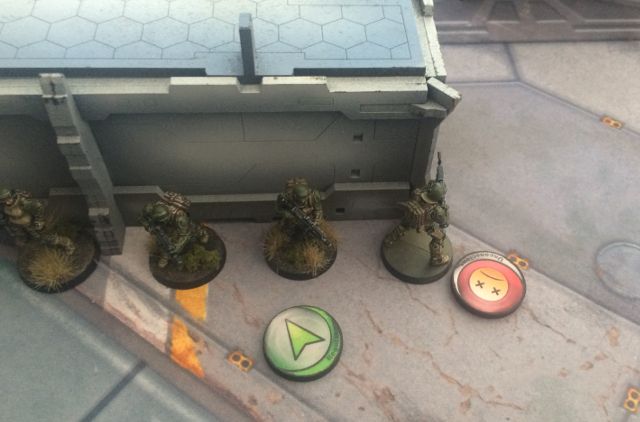
With a lucky WIP roll and a command token expended, the Grunt Link was back in action- hammering away at the Nisse.
It was a painful process though- 10 Burst later- only one landed on the Nisse... but fortunately for the Grunt, the sniper failed his armour roll and dropped unconscious.
 |
| Blam blam blam! |
With the Nisse out of the way, the Grunt link went on a rampage- taking out the Fusilier on the loading dock.
 |
| Fire and maneuver |
Sneaking around the side of the Mall, the Grunt HMG spied the exposed Trauma Doc and an Auxbot (the danger of all link teams!) and took them both out in a single round of shooting.
 |
| BBQ!! |
With the Auxbot out of the way, the infiltrating Grunt spied the Fusilier atop the power module and hosed him down with flames.
Panicked return fire missed and the Fusilier was burned to a crisp!
 |
| Charge! ... and smoke! |
 |
| Forward! |
With the number of AROs much reduced, the Devil Dog team loped forward. The TR Remote fired again but lost the face to face roll against the Devil Dog's smoke throw.
 |
| Safety. |
With a final scamper through the smoke cloud, the Devil Dog team made it across into the total cover of the garage.
 |
| Exploitation. |
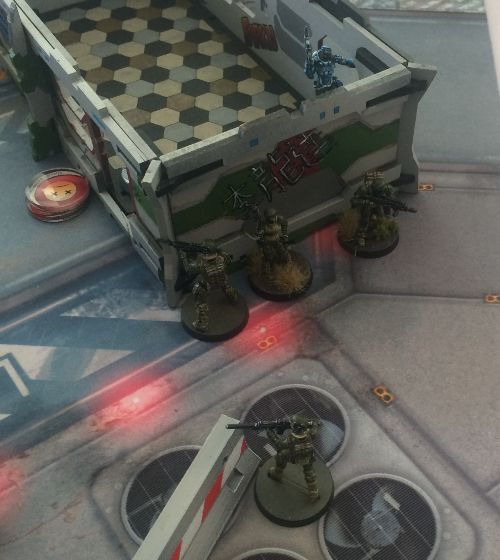
With the Devil Dog threatening one flank, the Grunt link team made its way down the opposite side.
 |
| Suprise. |
And took out the Auxilia in the doorway in a storm of rifle shots.
 |
| Watching the approaches. |
A pretty hard hitting first turn! Annoyingly I wasn't able to get rid of the TR remote, but I had put some serious pain onto PanO.
And I still had no points on the board....
PanOceania Turn 1
 |
| Time to clean house. |
Readying his spitfire, the Bounty Hunter made his way around the corner of the power module to confront the infiltrating Grunt.
 |
| Face off. |
The spitfire was unerringly accurate- bowling the Grunt over and knocking him unconscious. The return shot from the flamer was just as deadly though- burning the Bounty Hunter to death!
 |
| Hacker advances. |
The Fusilier Hacker made his way forward in the apartment building.
 |
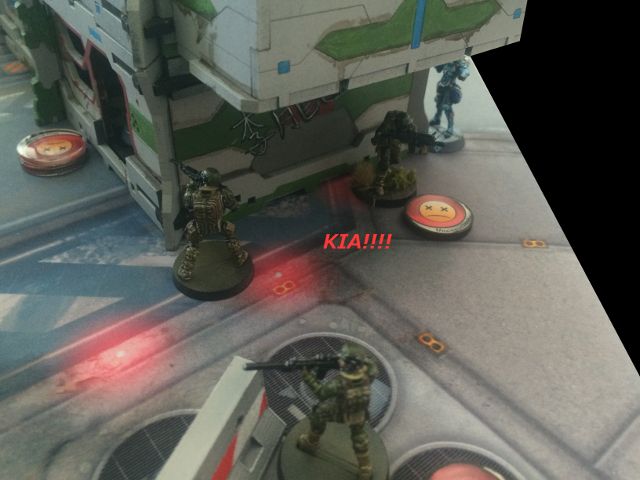
| Surprising the Grunt! |
Forgetting to use his pistol, the Grunt sprayed back with his rifle- which was totally outmatched by the Fusilier's combi-rifle.
 |
| Rekt. |
The Grunt crumpled under the fusillade and the Hacker continued his grim advance.
 |
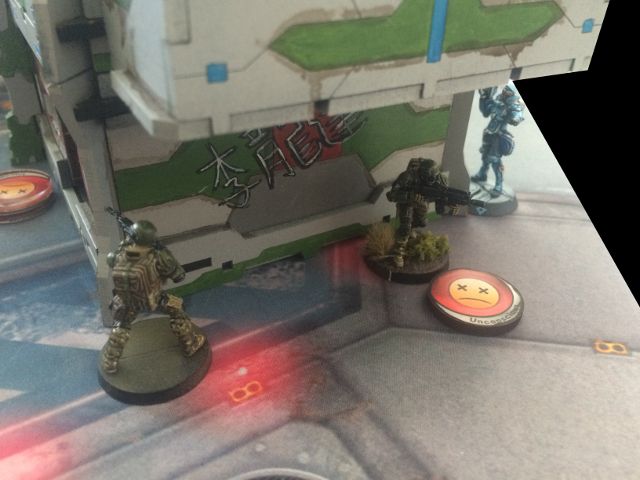
| Pistols! Pistols! |
 |
| Noooo! |
With another two Grunt knocked unconscious... the Hacker turned the corner.
 |
| Noooooooooooooo! |
The link team all but destroyed, the HMG Grunt ripped his side arm from its holster.
 |
| Boom! Headshot! |
Finally the dice gods smiled on me and the Grunt won the face to face roll with his pistol. The Hacker's run of luck ended as he failed his armour check and dropped unconscious.
With the final order- the remaining PanO figures on the board flipped into Suppression Fire.
With no objectives to either side- it was still anyone's game.
USAriadna Turn 2
Ouch!
Good thing this game is about objective points and not about kills... right?
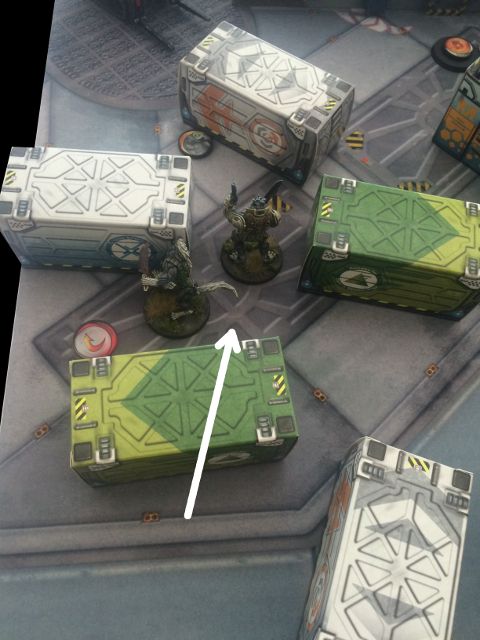
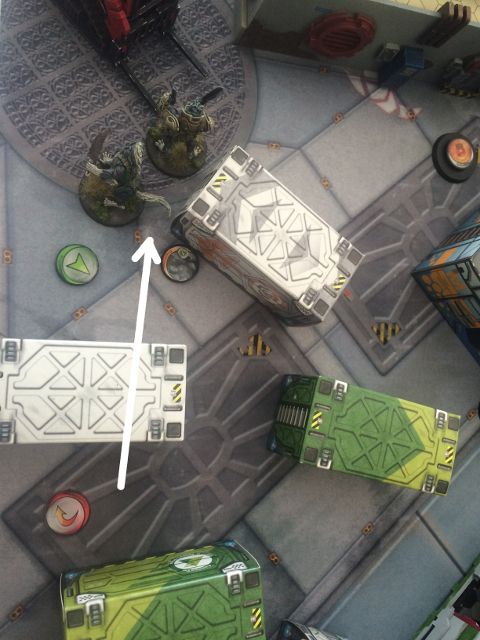
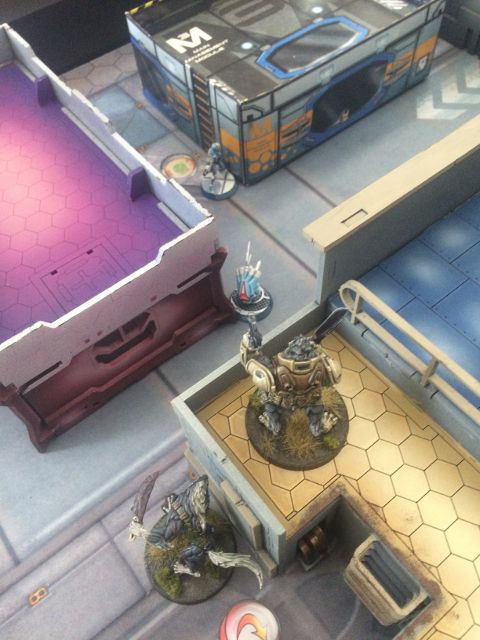 |
| Impetuous! |
Heedless of the possible of carnage, the Dog Warrior leapt over the garage and heavy shotgunned the the Aux-bot.
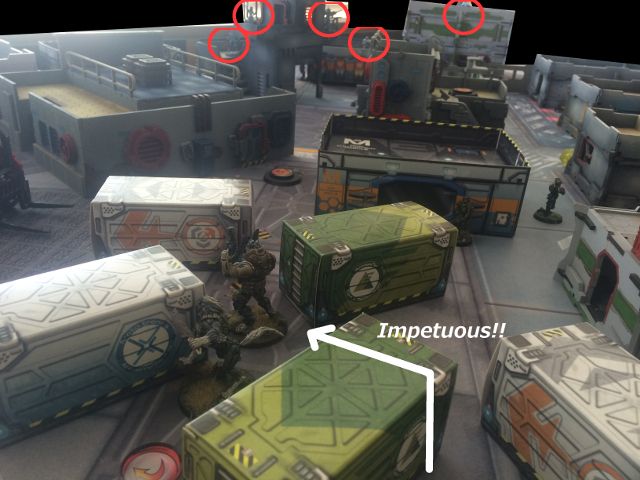
 |
| Enemy suppressive fire is intense! |
 |
| The outcome is quite predictable. |
The Devil Dog perished under the storm of lead but the shotgun blast took out the aux-bot and the auxilia.
 |
| More HMG action! |
Holstering his pistol, the last Grunt skirted the apartment.
 |
| Flanking shot! |
And found himself looking into the PanO back line!
 |
| Carnage. |
Two rounds of fire later- one Fusilier was dead and another knocked unconscious. Even Joan was forced to duck for cover.
 |
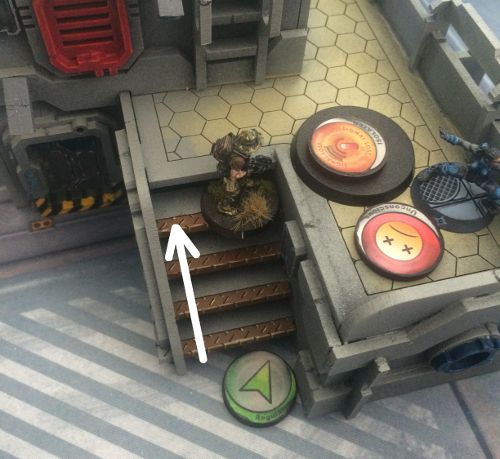
| This game is about objectives! |
With the flanks secure, it was time to get some points on the board. With that in mind the 112 made his way into the Mall.
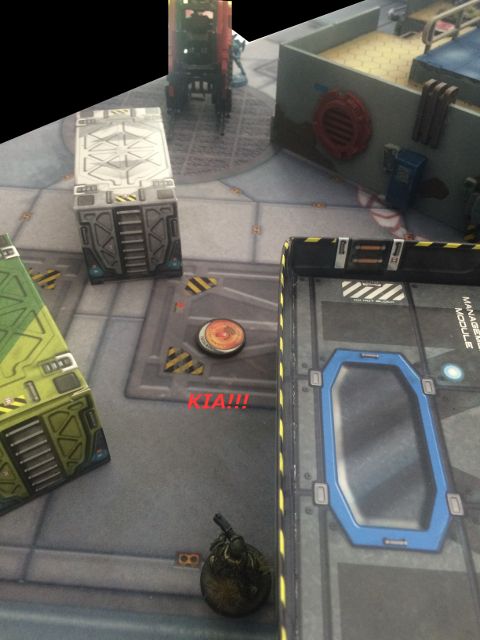
 |
| More surprises!? |
Only to find himself shot down by a waiting Crocman who appeared from hidden deployment!
I stupidly decided to risk taking the burst and rolled for the Supply crate (successfully). Predictably the Crocman's ARO shot knocked the 112 into the dirt.
 |
| Fine then, I'll get the other one. |
With the 112 out of the game, one of the Foxtrots advanced forward to contact the Tech Coffin on the opposite side.
 |
| Great success!! |
 |
| Quick- hide! |
The Foxtrot then beat a hasty retreat into total cover.
With that I had claimed at least one supply crate and hopefully PanO was too crippled by a lack of orders to contest it.
PanOceania Turn 2
 |
| Vengeance! |
Fed up with the Grunt picking on the PanO back line, the TR remote made its way over the apartment roof and poured fire down onto the exposed man. With no cover (and no ARO!) the Grunt bled out- cursing his poor positioning.
 |
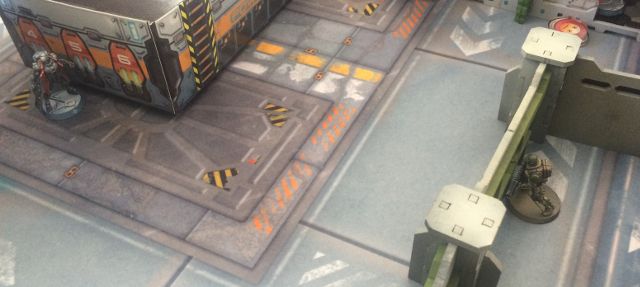
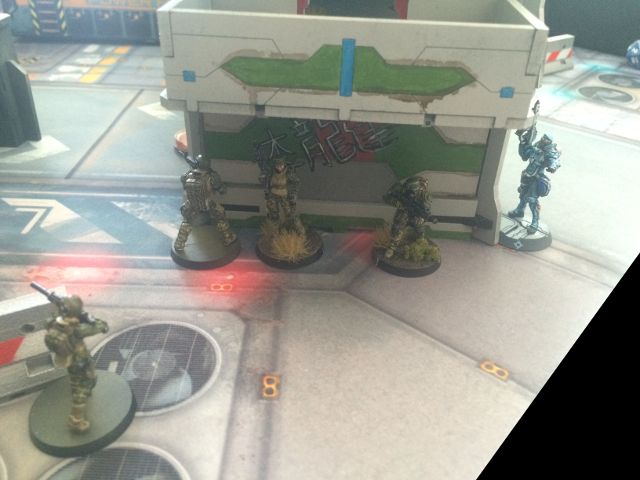
| Walk on Akalis. |
It was imperative that USAriadna hold no supply crates- and with that in mind the Akalis walked his way onto the board just outside the Container yard.
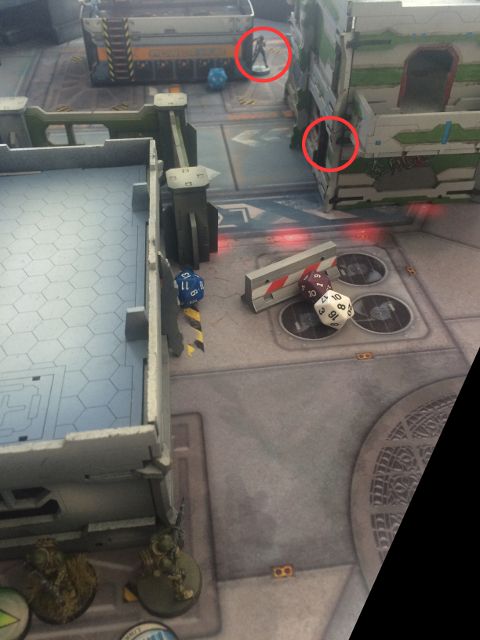
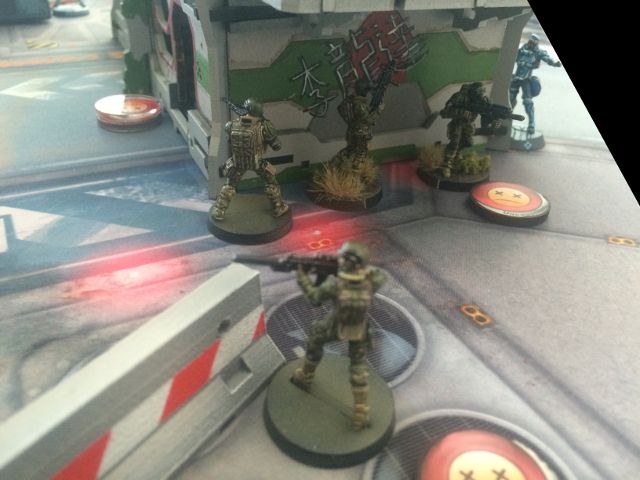
 |
| Foxtrot in the Akalis' sights. |
 |
| Gah! |
The Akalis fired unerringly on the Foxtrot who failed miserably with his flash pulse (rolling a 19!).
 |
| Co-ordinate move! |
With two dropped supply crates in view, Joan advanced as did the Crocman.
 |
| Enough of this! |
Seeing the Crocman moving towards the fallen supply crate, the last Foxtrot popped out of camouflage and fired his pistol in desperation. The Crocman fired back with a combi-rifle but it wasn't enough.
Luck was with the Foxtrot as he critted the Crocman and put the PanO infiltrator down.
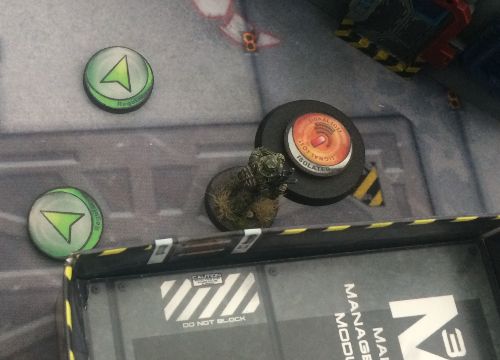
 |
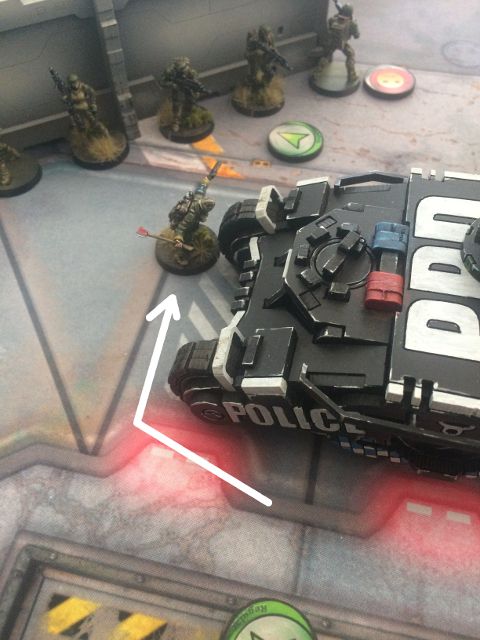
| Nervous! |
With the Crocman out of the fight, the Akalis spied the Marauder guarding the other dropped supply crate and fired.
 |
| Poor rolls! |
Unluckily the Akalis only hit once with a '1'.....
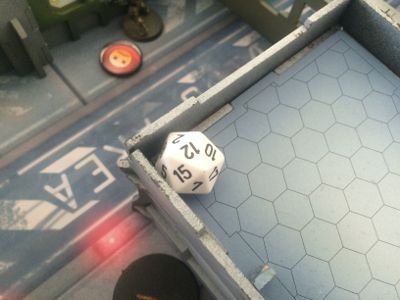 |
| Marauder dodges on a 12! |
Critical dodge!
Phew!
USAriadna Turn 3
With almost all my offensive power dead or unconscious it was time to secure those supply crates. I burned all my command tokens to put everyone into one combat group and looked around at the objectives.
 |
| Secure that package! |
Spying the supply crate by the 112, my Hardcase made his way forward.
 |
| Package secured. |
 |
| High tailing it out of dodge. |
With one of the supplies secured, it was time to grab the other one.
 |
| Minuteman avoids a TR HMG to the face. |
Rushing the short distance into the container yard, the Minuteman avoided the TR HMG remote overwatching from the Apartment.
 |
| Engaging the Akalis |
The burble of rifle fire rang out in the container yard with the Minuteman firing on the Akalis who elected to fire back.
 |
| Rekt! |
The Akalis faired the worse for it and crumpled to the ground.
 |
| Securing second package. |
 |
| Moving to a safer location. |
With the Marauder taking the second package- I thought I'd try for something unusual.
 |
| Engage! |
 |
| Bot on bot action! |
What I didn't account for was the appalling low BS and terrible range band penalties of the Traktor. And indeed, the range bands weren't that much better for the Sierra TR HMG on the apartment either.
 |
| Useful robotics... not even once. |
Whilst the two remotes spent their time spraying the skies with fireworks, I contemplated nabbing the last few victory points available.
 |
| Readying the FO. |
I could still get a classified, so my last Foxtrot made his way up the stairs of central processing.
 |
| The TR HMG shoots. |
That thorn in my side- the TR HMG Remote- fired back on the Foxtrot.
As luck would have it, the Foxtrot won the face to face roll and the remote found itself forward observed, getting me one more victory point.
PanOceania Turn 3
With three orders left, there weren't a lot of options.
Unable to reach the last tech coffin or target the survivors holding the supply crates- PanO conceded the game.
USAriadna Victory!!!
DISCUSSION
I liked that USAriadna has lots of orders. I took a real beating in Turn 1 but still had a solid pool of orders from which to play for objectives. This was helped a lot by having my specialists already in the right spot- Foxtrot FOs are great!
The Grunt link team performed as I expected- glass cannon style. The 3ARM is good but not really good enough to shrug off hits (not with my dice anyway). The fact they only have rifles- NOT combi-rifles- means I have to remember to switch to pistols at close range. I would have put that Fusilier hacker down first shot with a crit (I rolled a 14) if I had remembered to use pistols and I would have saved my entire link team (and 4 orders!).
As for the under performers in this match- the Traktor Mul gets a vote for just being rubbish in direct fire mode. It really needs an FO to help it out and even then I wonder at how easily the missiles would get hacked or ECM'd out of the sky.
The Maverick and the Devil Dog were also disappointments. The Maverick has a big base and an 8" impetuous move so it just died to overwatching fire. The smoke grenade launcher helps a bit I guess but in future I'm not putting her in the centre for everyone to see. Zooming down a flank (out of sight) would probably be a better play.
The Devil Dog was poorly deployed. Being such a tall silhouette (S6!) meant that everyone could see him behind those cargo containers and being impetuous he got no benefits from partial cover. He really needs good terrain to put his speed and super-jump into good use.
Anyways- back to the painting table for me. Hope you enjoyed reading this!
Until next time- happy hobbying.


No comments:
Post a Comment